Showing posts with label Daring Bakers. Show all posts

8.28.2012

Daring Bakers: Pate A Choux

Hey guys! Uhg - you have no idea how crazy busy I have been recently with all this back to school stuff. Seriously, so busy - I haven't had any time to blog!!

This month for Daring Bakers, our challenge was to bake pate a choux - basically, the dough used for cream puffs and eclairs. Pretty yummy, right? 

Kat of The Bobwhites was our August 2012 Daring Baker hostess who inspired us to have fun in creating pate a choux shapes, filled with crème patisserie or Chantilly cream. We were encouraged to create swans or any shape we wanted and to go crazy with filling flavors allowing our creativity to go wild!
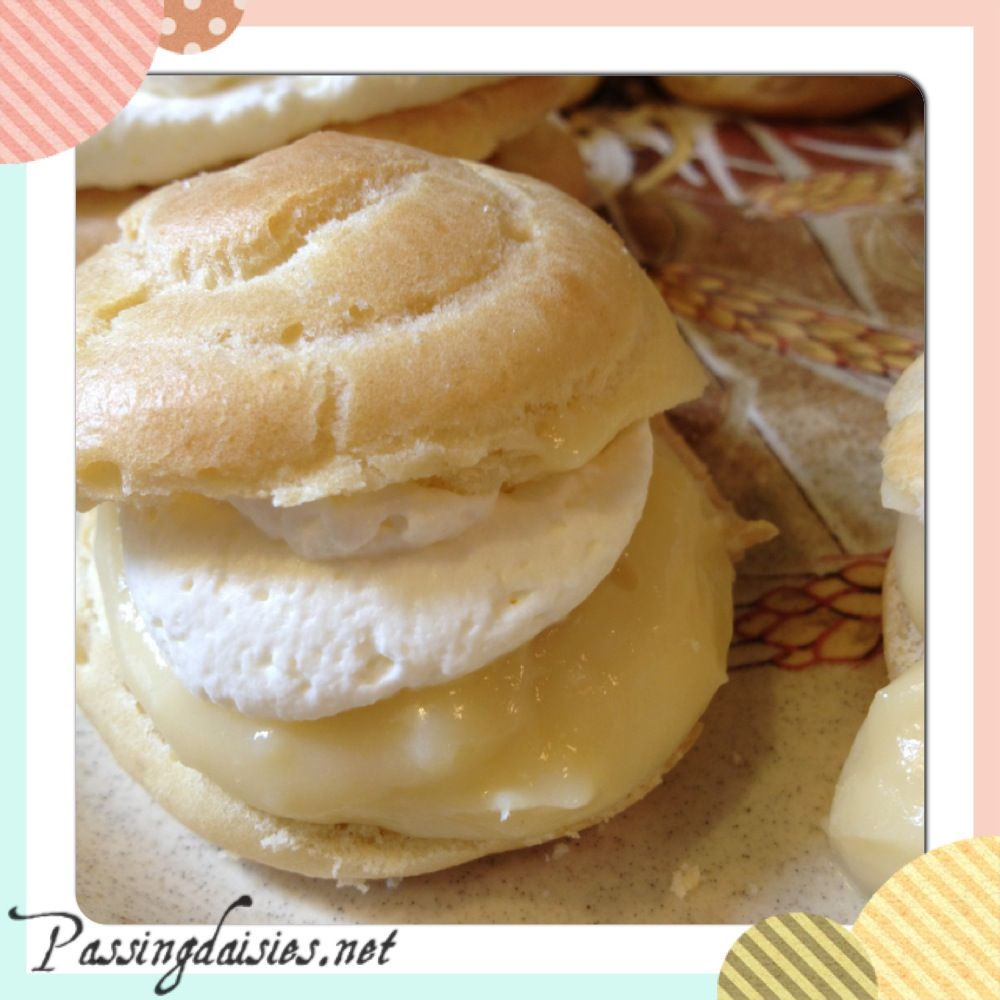

They turned out pretty and incredibly delicious, but I decided to go with the typical circle instead of making swans. I filled mine with a vanilla cream (it was more like a pudding with the flavor or tapioca) and white chocolate whipped cream. Mmmm boy was it delicious! 

Seriously, cream puffs are my favorite. If I'd had some, I would've put melted chocolate on top. 

This was the recipe I used to make the dough. Below is the recipe I used for the cream filling. I hope you enjoy it! 

Vanilla Crème Patissiere

Ingredients:
1 cup whole milk
2 Tbsp. cornstarch
6 Tbsp. sugar
1 large egg
2 large egg yolks
2 Tbsp. unsalted butter
1 Tsp. Vanilla
Directions:
  1. Dissolve cornstarch in ¼ cup of milk. Combine the remaining milk with the sugar in a saucepan; bring to boil; remove from heat.
  2. Beat the whole egg, then the yolks into the cornstarch mixture. Pour 1/3 of boiling milk into the egg mixture, whisking constantly so that the eggs do not begin to cook.
  3. Return the remaining milk to boil. Pour in the hot egg mixture in a stream, continuing whisking.
  4. Continue whisking (this is important – you do not want the eggs to solidify/cook) until the cream thickens and comes to a boil. Remove from heat and beat in the butter and vanilla.
  5. Pour cream into a stainless steel/ceramic bowl. Press plastic wrap firmly against the surface. Chill immediately and until ready to use.

Much love, 

7.27.2012

Daring Bakers: Crackers

Welcome to this month's edition of Daring Bakers: crackers edition! 

Our July 2012 Daring Bakers' host was Dana McFarland and she challenged us to make homemade crackers! Dana showed us some techniques for making crackers and encourage us to use our creativity to make each cracker our own by using ingredients we love. 

I hope I didn't disappoint! 

Another part of the challenge was that you had to make two different types of crackers using two different methods. You could make hand rolled crackers, icebox crackers, or pasta roller crackers. I chose to make hand rolled and icebox, considering I don't have a pasta roller. 

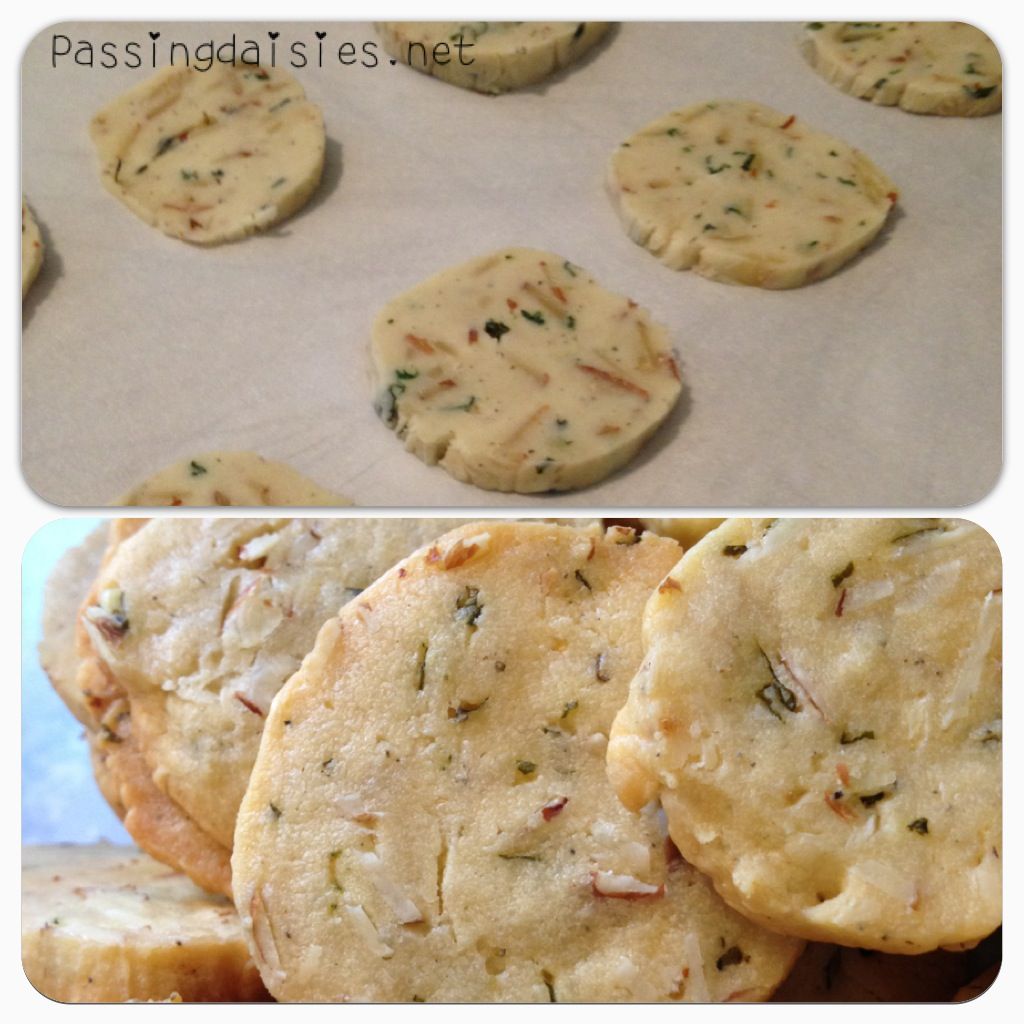
The first cracker I made was a Boursin cheese, basil, and almond icebox cracker. This recipe was based on one that was given to us for the challenge - a cheddar, rosemary, and walnut icebox cracker. Because I didn't have quite a few ingredients in my pantry, I improvised. My family loved these crackers and they had a  strong Boursin cheese spread flavor. They were also very crispy. Yum. You want the recipe? 


Boursin Cheese, Basil, & Almond Icebox Crackers
Ingredients
1 stick unsalted butter, softened
1 cup Boursin Vermont White Cheddar & Sage Cheese Spread
1 cup + 3 T. all purpose flour
1 t. salt
1/2 c. slivered almonds
1 T. finely chopped basil 

Directions
1. Combine butter, basil, and cheese spread in a mixer. Combine well. 
2. Add flour, salt, and nuts and mix well. Don't over mix!
3. Divide dough in half, Place each half on plastic wrap and form into two logs. Place logs in fridge for anywhere from 1 hour to overnight. 
4. Preheat oven to 325 degrees F. 
5. Slice logs into thin slices and place on a parchment paper lined baking sheet. 
6. Bake crackers for 10-15 minutes, until golden brown and crispy. They will firm up as they cool. Store in an air tight container and enjoy!

I also made some homemade Ritz crackers. These were hand rolled. You can find the recipe here. 

Oh my word. These were divine. 


Yes, they do taste like Ritz crackers. So buttery and delicious. I put garlic powder on top of mine for added flavor. I could seriously eat an entire recipe of these in on sitting. Luckily, I restrained myself and shared with others :)

A successful challenge, I would say! Enjoy! 

Much love, 

6.27.2012

Daring Bakers: Battenberg Cake

First, congrats to the winners of the last set of 21 Days of Giveaways winners! 


Mary B - Cookiehead brownies
Mkbell -Jillian Michael's DVD
Amy Lauren –Amy’s coupons
Laurel C – Perfect Fit Protein Powder
Positivelyhope – Trader Joe’s Gift Card
Janice - NuNaturals Liquid Stevia
Meredith M - NuNaturals Liquid Stevia
Jordan - NuNaturals Liquid Stevia
Rebecca  - NuNaturals Liquid Stevia


Congrats! Please email me your addresses so the goodies can be mailed to you! :)

This month for Daring Bakers, we made Battenberg Cake. Do you know those artsy little cakes that look like this?


Aren't they pretty? 

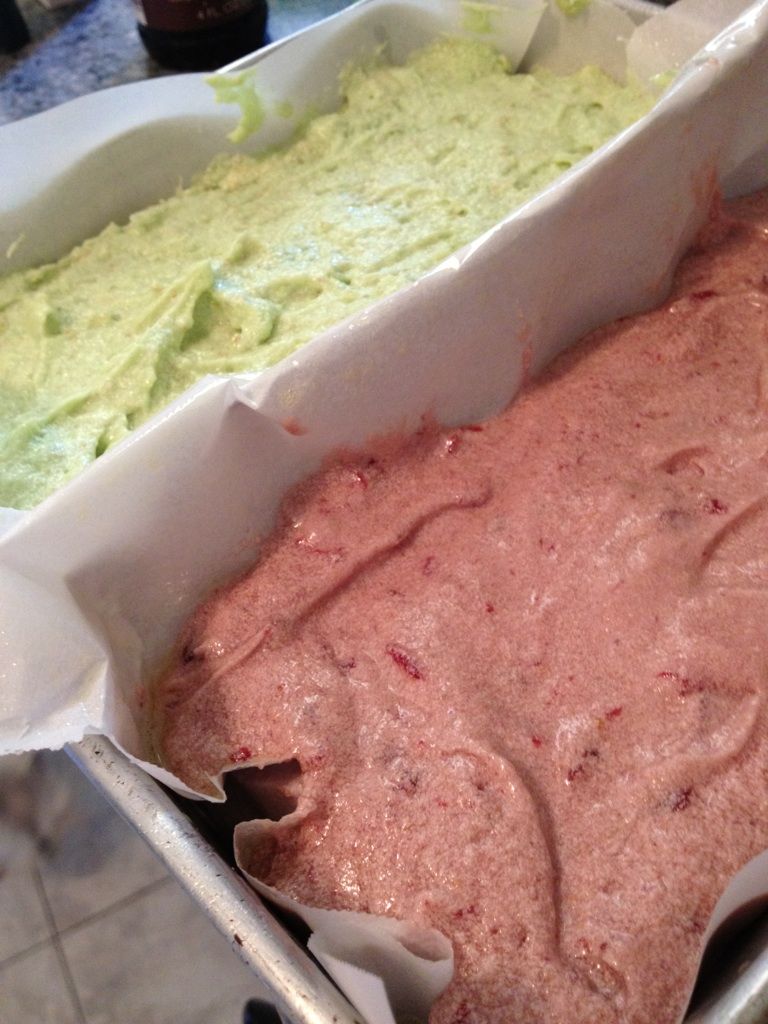
Well, mine didn't work out so much. I tried to make a cherry lime battenberg cake. 

Mandy of What The Fruitcake?! came to our rescue last minute to present us with the Battenberg Cake challenge! She highlighted Mary Berry’s techniques and recipes to allow us to create this unique little cake with ease.

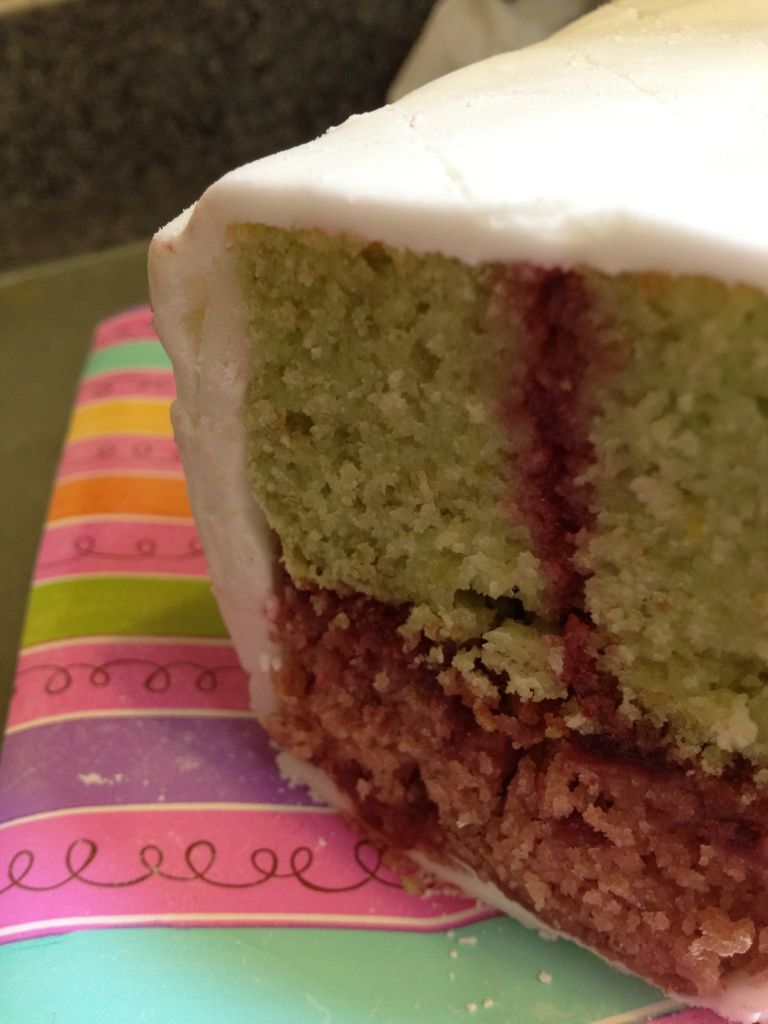
Or at least, that's what we were told. This cake was definitely not easy for me. It should have been, but some of the flavoring tweaks I made to the cake recipe made for a very crumbly cake that didn't hold up. Not to mention that the cake colors looked awful. I was going for a beautiful pale pink and green, but instead....well, see for yourselves. 


It looked good going into the oven...


...And terrible coming out of the oven. The lime cake (green) held up pretty well, but the cherry cake (red) turned ugly and broke apart whenever it was touched. Needless to say, I will have to try making this cake again...but following the recipe this time! It's just too bad that I hate following recipes so much....

Hopefully it'll be better next time! Thanks Daring Bakers!

Much love, 

5.27.2012

Daring Bakers: Challah Bread

There is nothing like a good Challah bread.


Okay, so maybe this is the first time I have ever baked/tried challah before, but it was an extremely delicious experience. Thank you, Daring Bakers, for giving me the chance to try this! 

May's Daring Baker's challenge was pretty twisted - Ruth from The Crafts of Mommyhood challenged us to make challah! Using recipes from all over, and tips from "A Taste of Challah," by Tamar Ansh, she encouraged us to bake beautifully braided breads. 

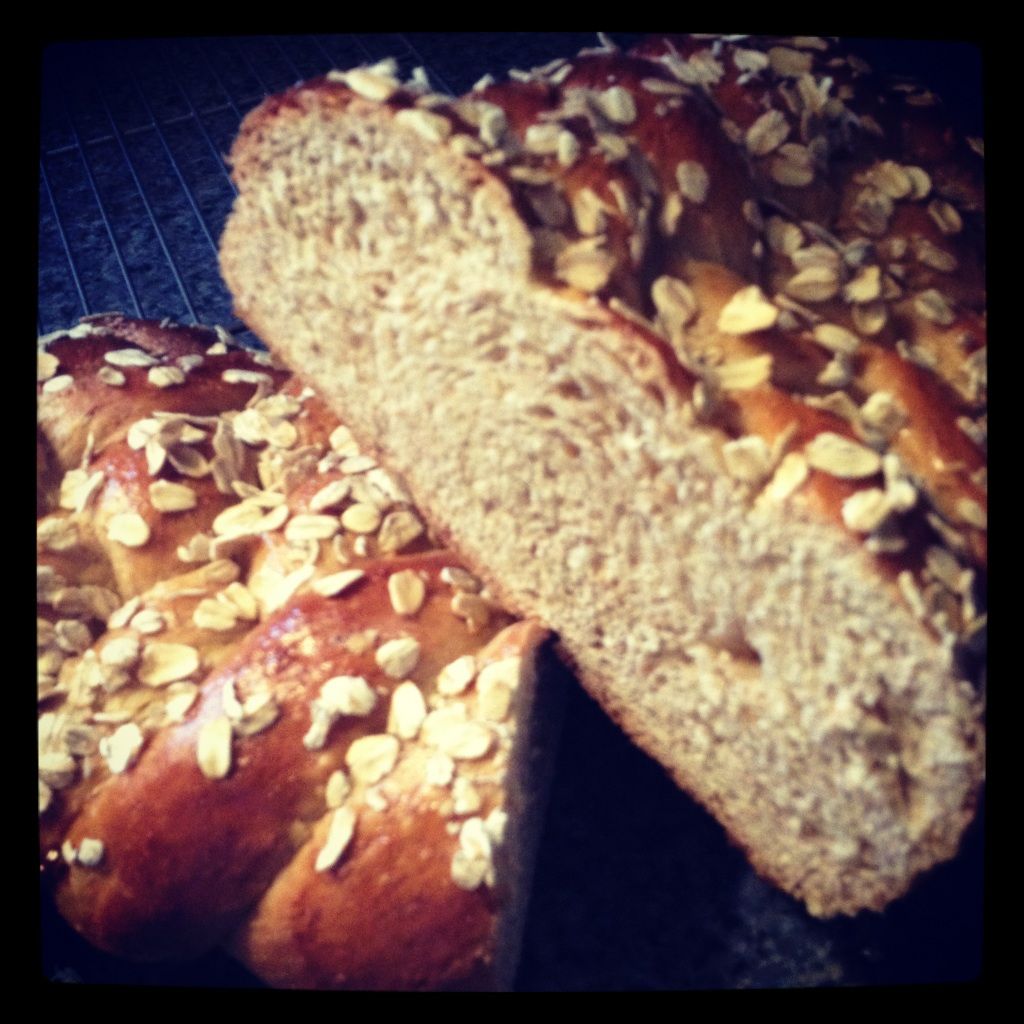
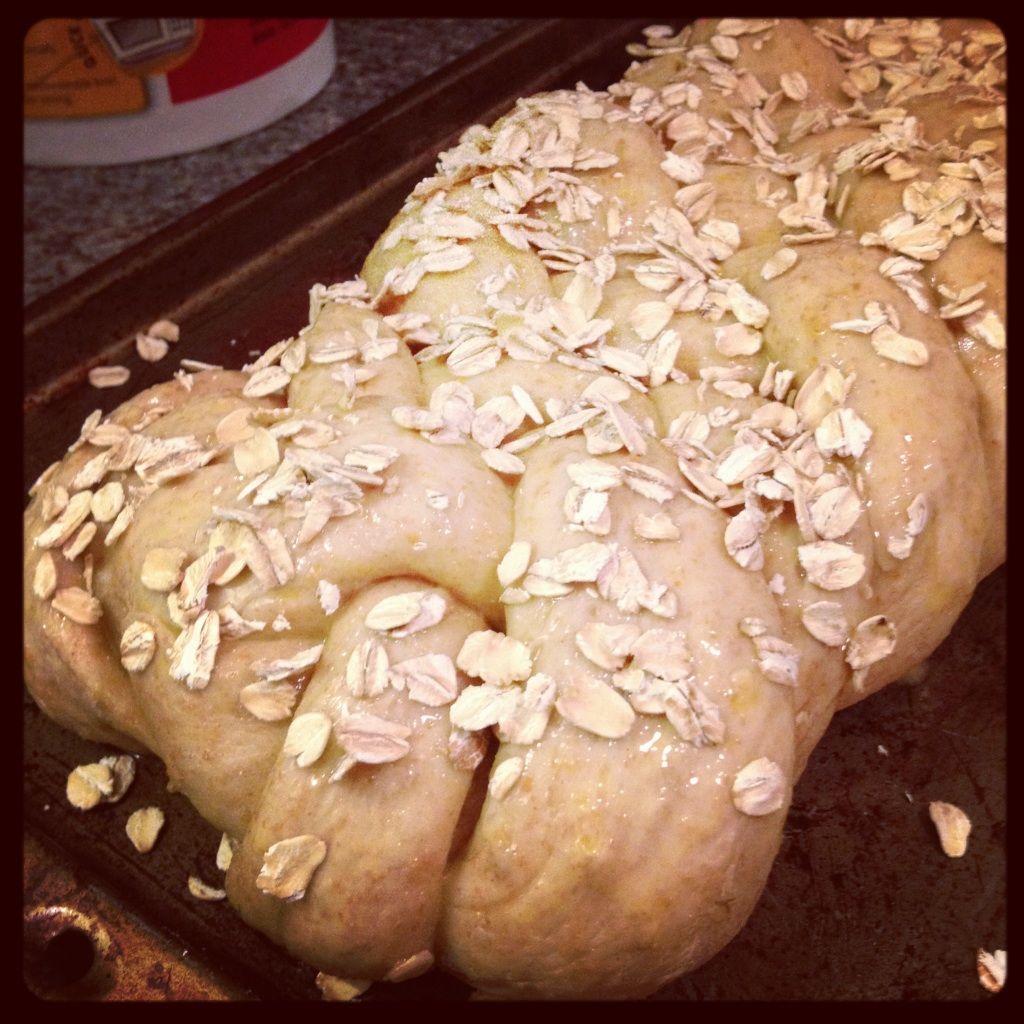
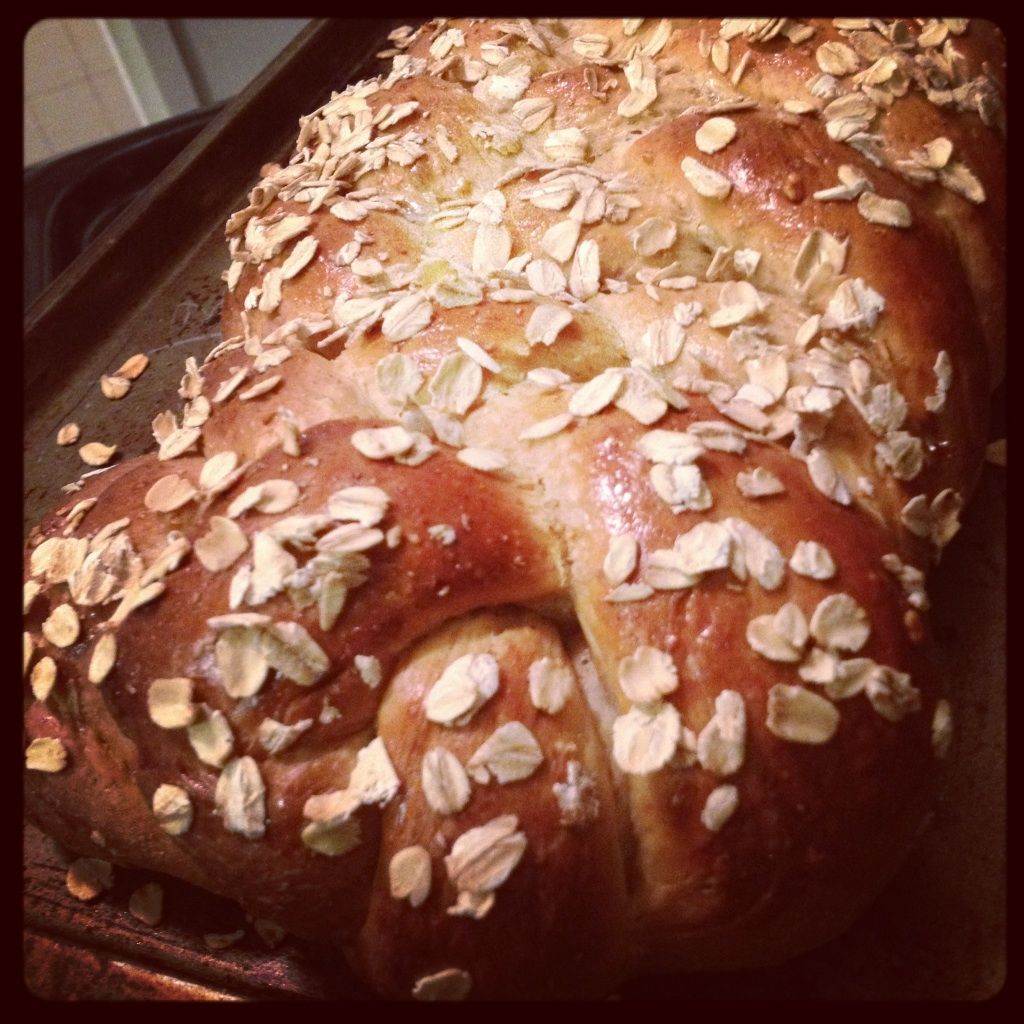
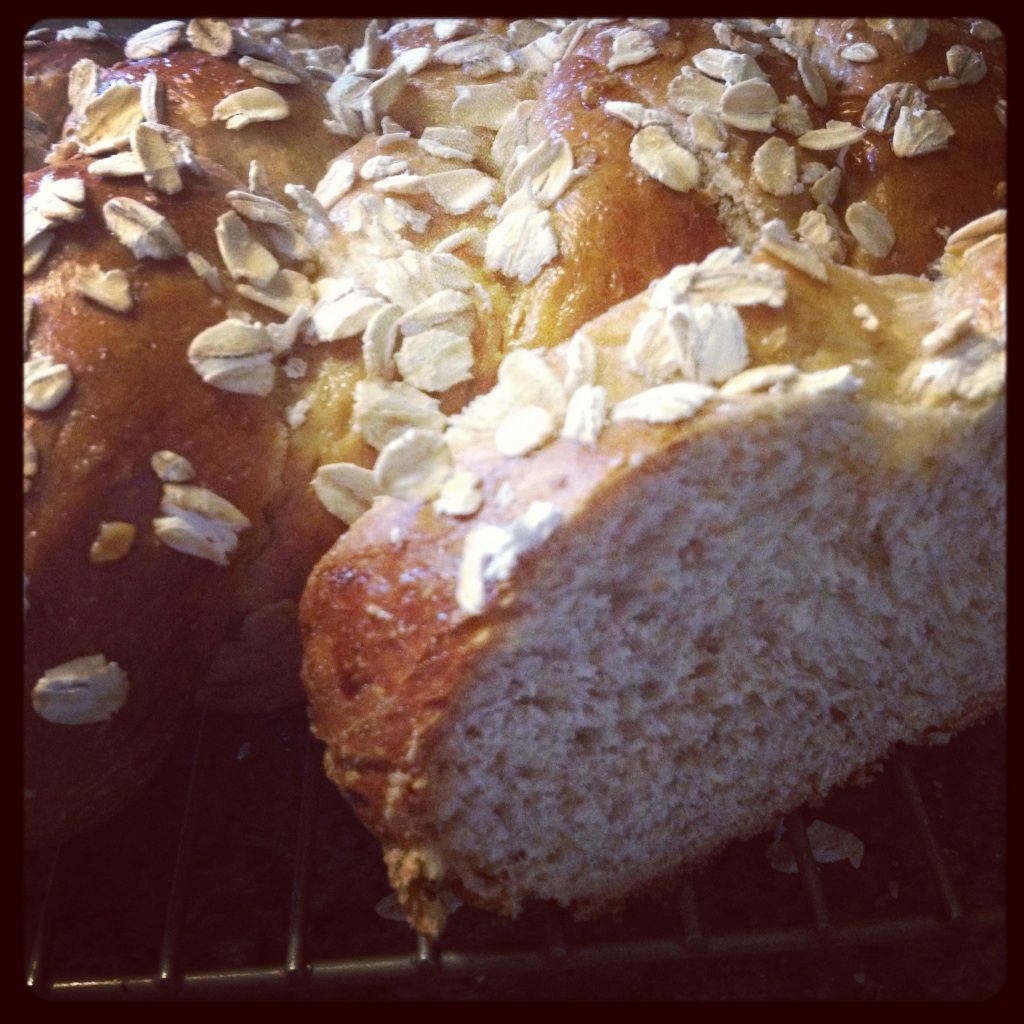
The bread I chose to make a six strand, whole wheat challah. I even sprinkled some oats on top just to make it pretty. Did it work?

This bread was lightly sweet and makes delicious toast.

Before baking!
This was also surprisingly easy to make. It simply requires patience (it takes lots of rising time!)

Out of the oven it comes!
I highly encourage you to try making this bread. It's very hearty and I think it would make delicious sandwich bread!


Here's the recipe - straight from the Daring Baker's! Let me know what you think if you decide to try it for yourself!

Ruth’s “Go-To” Whole Wheat Challah

(adapted from D’s Whole Wheat Challah)
Servings: 12
Ingredients
2 (.25 oz.) packages (4½ teaspoons) (22½ ml) (15 gm) (½ oz) dry yeast
1 cup (240 ml) warm water (100°F/38°C)
½ cup (120 ml) (100 gm) (3½ oz) brown sugar, firmly packed
½ cup (one stick) (120 ml) (115 gm/4 oz) margarine or unsalted butter – room temperature
2 tsp. (10 ml) (15 gm) (½ oz) salt
3 large eggs
2 cups (480 ml) (280 gm/10 oz) whole wheat flour
2 cups (480 ml) (280 gm/10 oz) all-purpose flour
½ cup (120 ml) (50 gm) (1¾ oz) rolled oats (Old Fashioned work just fine!)
Additional flour for kneading (½ to 1 cup) (120 to 240 ml) (70 to 140 gm) (2½ to 5 oz)
1 egg beaten with 1 tsp. water for glaze
Directions:
1. In the bowl of your stand mixer, dissolve yeast in warm water. Allow to stand about 5 minutes until creamy/foamy.
2. With paddle attachment beat 3 eggs, sugar, margarine (or butter), whole wheat flour, all purpose flour and oats into the yeast mixture. Or, if mixing by hand (ok, spoon), combine eggs and margarine/butter with yeast mixture until well mixed. Add flours and oats and mix until it becomes difficult to mix.
3. Once combined, switch to the dough hook and knead for 5 to 10 minutes until smooth and elastic, adding flour as/if needed. If kneading by hand, this should take about 10-12 minutes.
4. Form dough into a round, compact ball. Turn in oiled bowl, cover with a kitchen/tea towel. Let rise in warm area (I put it in the oven with the light on) until doubled, approx. 2 hours.
5. Once dough has doubled, punch down. Recover with towel, allow to rise again for an hour, but even 30 minutes will be fine if you’re in a hurry.
6. Punch the dough down again, divide in two.
7. Shape each half as desired (3, 4 or 6 strand braid, rolls, etc.). Place shaped loaves onto parchment covered baking trays. Cover with the towel and allow to rise another hour.
8. Preheat oven to 350 degrees.
9. Brush loaves with egg wash. (Sprinkle with vanilla sugar/sesame seeds/poppy seeds/other topping here if desired)
10. Bake 30 to 40 min. until the loaf sounds hollow when tapped on the bottom.
11. Transfer loaves to a wire rack to cool before serving.

Much love, 

4.27.2012

Daring Bakers: Armenian Nazook & Nutmeg Cake

Hey guys! It's time again for the Daring Bakers challenge of the month! It's a little late at night, I realize, but I still managed to post by the deadline without forgetting :) Go me!

Before we get into the yummy recipes from this month, I have some news... my first 5k is tomorrow at Sharon Woods. I'm nervous, especially because 1) my legs are really sore from doing some leg workouts by the Tone It Up ladies  and 2) today was the first time I've run in a few weeks... and I had to take a brief breather after running a half mile, then walked/ran the last half mile. So I did about a mile today, and my side started really hurting after that. Needless to say, I'm nervous for tomorrow.


We stopped at DeSha's restuarant tomorrow to pick up our running bib, tshirts, and registration info. My parents will be walking and I will be running/walking. I feel so official with my little running bib! :) Anyways, wish me luck because I'm super dooper nervous I'm gonna feel crappy or something terrible!

I also am STOKED for a few reasons. First, school is out in a week!!! Yay!!! This was my last week of school, and next week I just have to slug my way through finals. Then summer is here and I can start my social media internship with Daelia's Biscuits for Cheese. They are essentially gourmet biscuits/crackers used for appetizers that are sold in gourmet grocery stores (ie: Whole Foods, Findlay Market, Jungle Jims, and Dorothy Lane Market).  I even get to go to a gourmet food show (The Fancy Food Show) in Washing DC with my boss in June! Ahhhh so PUMPED. I'm really looking forward to that.

Then, I just found out there is a very high chance that I have received a fall editorial internship with Cincinnati Magazine! That was totally unexpected. THEN, yesterday, Xavier hosted it's new "XavierFest" which featured a ton of free food, vendors, free tshirts, and free music with local bands. It was pretty cool; I love the tshirts and I got SO MUCH free food. It was awesome - I highly recommend StreetPops if you are from Cincinnati. Their key lime pie popsicle was delicious Then, today I went shopping at Target and got two new dresses and some swim short s(which I've been needing for a couple years now and procrastinated on buying...) AND I got to go bowling with the Newswire staff... us journalism geeks sure know how to bowl and party.

Myself and Jake, the outgoing Editor-in-Chief, with our baseball bats

Clearly I am a fabulous bowler (not).
Now on to more exciting things... food! This month's DB challenge.

The Daring Bakers' April 2012 challenge, hosted by Jason at Daily Candor, were two Armenian standards: nazook and nutmeg cake. Nazook is a layered yeasted dough pastry with a sweet filling, and nutmeg cake is a fragrant, nutty coffee-style cake.

First up: Armenian Nutmeg Cake


Oh my word was this cake DELICIOUS. It tastes like a really moist and yummy coffee cake, using nutmeg instead of the traditional cinnamon. As you can see, I loaded the top of mine up with crushed almonds, although the tradition nutmeg cake uses a sprinkle of walnuts. I just happened to have almonds on hand. This was a favorite by everyone who tried it (including myself).  Click here to see video instructions on how to make this cake! I highly recommend trying it. There is also this crust of yummy goodness at the bottom that is actually the dry ingredients of the cake batter - very different and scrumptious. 

Next: Nazook


These were also really good! This was flaky dough, rolled up and stuffed with a crumb filling. You can't really go wrong here. These were really easy to make too! Again, click here for video instructions! These would be the perfect treat for a Sunday brunch (as would the nutmeg cake...)

Overall, I really enjoyed this month's DB challenge.

I'm off to bed so I'm ready to run tomorrow!

Much love,

3.27.2012

Daring Bakers: Dutch Crunch Bread

Hey friends! I'm sorry it has been so incredibly long since I've posted - I apologize! I have been so swamped with homework it has been ridiculous! And I still am, actually. I have also bought into The Hunger Games craze - read the books, if you haven't. They are phenomenal! I literally cannot put them down.

And Josh Hutcherson + Liam Hemsworth? It's a beautiful thing.

If you've seen the movie, what do you think of it? And do you like Josh better with blonde hair (as Peeta in THG) or with his dark brown hair? I gotta say, I can't decide, although I think I'm leaning towards blonde!

Alright - I shall give you more updates on my life later. For now, check out the bread I made this month with The Daring Bakers!

Sara and Erica of Baking JDs were our March 2012 Daring Baker hostesses. Sara & Erica challenged us to make Dutch Crunch bread, a delicious sandwich bread with a unique, crunchy topping. Sara and Erica also challenged us to create a one of a kind sandwich with our bread! 


There is my beautiful brown rice dutch crunch bread I made! Isn't it pretty? Although I did not take a picture of the sandwich we were required to make (oops), I highly recommend trying this on a tomato sandwich! Simply toast the bread, spread with some mayo, and add sliced tomatoes. Seriously, it's good! 

My bread was a little under-cooked. Oops. I think my loaf pan might have been a little smaller than what was specified, so I needed to cook the bread longer and didn't. Oh well. It was still tasty, although I can't say I absolutely loved this bread. I thought the topping was rather flavorless and the bread kind of...well..boring. I don't know. Wasn't a huge fan. Which is why I will not be posting the recipe. If you are interested, go look up the recipe for yourself!

Speaking of bread...


Hah. Okay. I'm done with Hunger Games references....for now :)

Much love,

2.27.2012

Daring Bakers: Lemon Loaf with Fresh Berries


The Daring Bakers’ February 2012 host was – Lis! Lisa stepped in last minute and challenged us to create a quick bread we could call our own. She supplied us with a base recipe and shared some recipes she loves from various websites and encouraged us to build upon them and create new flavor profiles.

I took her recipe for Meyer Lemon Loaf and tweaked it just a little bit by adding fresh berries for an extra burst of flavor. This was so yummy! My mom loved it so much that she ate nearly the entire loaf by herself!

Lemon Loaf with Fresh Berries

Makes two 8” x 5” (20 x 13 cm) loaves
Adapted from Recipe Girl’s Meyer Lemon Loaf

Ingredients
LOAF:
2 2/3 cups all-purpose unbleached flour
¾ teaspoon baking powder
zest of 3 lemons
2 cups sugar
6 large eggs, at room temperature
¾ cup  sour cream, at room temperature
2 tablespoons  rum (can omit – I did!)
1½ tablespoons fresh lemon juice
pinch of salt
9 tablespoons butter, melted and cooled
1 pint raspberries
1 pint blueberries
a handful of sugar

SIMPLE SYRUP:
½ cup sugar
½ cup water
Juice from 1 medium lemon 

Directions:
  1. Preheat oven to moderate 350°F. Butter and flour two 8” x 5” loaf pans.
  2. Sift together flour and baking powder; set aside.
  3. Place sugar, lemon zest, and eggs into a large mixing bowl and beat with a whisk until the mixture is a light lemon color and thickened a bit. Whisk in sour cream, then salt, then rum (if using) and lemon juice.
  4. Gently whisk in the flour in four parts, then whisk in the butter in three parts. You’ll have a thick, pourable batter flecked with lemon zest.
  5. Pour the batter into the prepared pans.
  6. In a separate bowl, mix fresh berries and sugar. Allow to sit until berries have started to ooze juice. Using a spoon, cover the tops of each loaf with the berry mixture.
  7. Bake for 50 to 55 minutes, or until cake tester inserted in center comes out clean.
  8. While the loaves are baking, prepare simple syrup. Boil together sugar and water and stir until sugar is dissolved. Remove from heat and add the lemon juice.
  9. Turn the loaves out of their pans onto a cooling rack and brush liberally with the lemon syrup, repeat brushing as you feel necessary. Let cool.


I'd say it looks pretty good - wouldn't you? :) 

Much love,

1.27.2012

Daring Bakers: Biscuits


Soft, flakey biscuits. What could possibly be better? 

Audax Artifex was our January 2012 Daring Bakers’ host. Aud worked tirelessly to master light and fluffy scones (aka biscuits) to help us create delicious and perfect batches in our own kitchens!

Thanks to this recipe, I got to try my hand at making biscuits, which are very simple to make and turned out to be very delicious. Although I made mine a little too thin, they still were soft and melted in your mouth. 

Below is the recipe I used, created by Audax Artifex, with a few changes made to veganize the recipe. Enjoy!

Biscuits 
Ingredients:
1 cup  plain (all-purpose) flour
2 teaspoons baking powder
¼ teaspoon sea salt
2 tablespoons frozen grated Earth Balance Buttery Spread
approximately ½ cup cold Whole Soy & Co. plain yogurt
optional extra soy yogurt, for glazing the tops of the scones
Directions:
1. Preheat oven to 475°F.
2. Triple sift the dry ingredients into a large bowl.
3. Rub the frozen grated butter into the dry ingredients until it resembles very coarse bread crumbs with some pea-sized pieces.
4. Add nearly all of the liquid at once into the butter mixture and mix until it just forms a sticky dough. The wetter the dough the lighter the biscuits will be!
5. Turn the dough out onto a lightly floured board, lightly flour the top of the dough. To achieve an even homogeneous crumb to your scones knead very gently about 4 or 5 times (do not press too firmly) the dough until it is smooth. To achieve a layered effect in your scones knead very gently once (do not press too firmly) then fold and turn the kneaded dough about 3 or 4 times until the dough has formed a smooth texture. (Use a floured plastic scraper to help you knead and/or fold and turn the dough if you wish.)
6. Pat or roll out the dough into a 6 inch by 4 inch rectangle by about ¾ inch thick. Using a well-floured 2-inch biscuit cutter (or, I used the top of a glass), stamp out without twisting six 2-inch rounds, gently reform the scraps into another ¾ inch layer and cut two more biscuits. Or use a well-floured sharp knife to form squares or wedges as you desire.
7. Place the rounds just touching on a baking dish if you wish to have soft-sided biscuits or place the rounds spaced widely apart on the baking dish if you wish to have crisp-sided biscuits. Glaze the tops with milk if you want a golden colour on your scones or lightly flour if you want a more traditional look to your biscuits.
8. Bake in the oven for about 10 minutes (check at 8 minutes since home ovens at these high temperatures are very unreliable) until the biscuits are well risen and are lightly coloured on the tops. The biscuits are ready when the sides are set.
9. Immediately place onto cooling rack to stop the cooking process, serve while still warm.

Thanks for the successful challenge this month, Daring Bakers! I loved the biscuits! :)

Much love,

12.27.2011

Daring Bakers: Sourdough Bread

Sometimes, in baking....thing don't work out so well.

Exhibit A: my sourdough bread for this month's Daring Baker's challenge.


One thing I learned from this challenge: I shall never make sourdough bread again. Buying it is much easier! 

I'm not exactly sure what happened. It turned out VERY doughy and disastrous. I followed all the directions exactly... maybe I'm just not meant to make sourdough?


Another reason I will never make sourdough bread again: it STINKS. Literally. Making the wheat starter smells disgusting and definitely sour! 

Better luck to everyone else who made sourdough this month as well!

Much love,

11.27.2011

Daring Bakers: Sans Rival

 Catherine of Munchie Musings was our November Daring Bakers’ host and she challenged us to make a traditional Filipino dessert – the delicious Sans Rival cake! And for those of us who wanted to try an additional Filipino dessert, Catherine also gave us a bonus recipe for Bibingka which comes from her friend Jun of Jun-blog.

NOTE: I did not make the Bibingka, although it did sound good! I'm not gonna lie, I was a bit intimidated by the thought of making vegan meringue. 

But you know what? 

It actually worked. 

Read on, my friends!

Sans Rival

Servings: 12


Ingredients

Vegan Meringue (a soft meringue)
Equivalent of 10 Ener-G Egg Replacers (I know, it's a lot! Include the necessary amount of water as well)
1 cup sugar
1/2 tsp. pectin (powder)
1 tsp. vanilla extract 
2 cups ground, toasted cashews (I used almonds) + extra chopped nuts for garnish
1 recipe of your favorite vegan buttercream icing

Directions
1. Preheat oven to moderate 325°F.
2. Line cake pan bottoms with parchment paper and butter and flour the sides really well.
3. In a large mixing bowl, beat Egg Replacer, pectin, vanilla, and water on medium until foamy. Gradually add sugar, a couple of tablespoons at a time, continuing to beat now at high speed until stiff shiny peaks form. (about 7-10 mins.)
4. Fold in ground nuts.


5. Divide meringue into four equal parts. Spread in pans, evenly to edges.
6. Bake in preheated oven for 30 minutes, or until golden brown. Remove the meringue from the baking pans while still hot; allow to cool slightly. Peel off the parchment paper while it is still warm.
7. When cool, trim edges so that all 4 meringue layers are uniformly shaped. Set aside.
8. Make your favorite vegan buttercream recipe. 
9. Alternate layers of the meringue with the buttercream.


10. Frost the edges and top of the meringue cake and press the chopped nuts onto the sides for garnish. Ta-da! You're done!


Honestly, I'm just shocked that my vegan meringue turned out. I combined two recipes, the original meringue recipe and a vegan meringue I found online (but it took two hours to make, which is why I decided to combine the two recipes.) As mentioned at the beginning, this meringue is soft like a cake, which I'm assuming is how it's supposed to be for this recipe. 

The cake was utterly delicious. I put a bit too much icing on mine, but it was very sweet and delectable. I really don't have much else I can say about this recipe. 

Thanks for the challenge, Daring Bakers! 

Much love, 

10.27.2011

Vegan MoFo #27: Povitica

It's time for a another Daring Baker's challenge!


The Daring Baker's October 2011 challenge was Povitica, hosted by Jenni of The Gingered Whisk. Povitica is an Eastern European dessert bread that is as lovely to look at as it is to eat!


 Doesn't it look super pretty?! And it wasn't too hard to veganize, either! Here's how to make it!


Povitica
Ingredients:
To activate yeast:
1/2 t. sugar
1/4 t. unbleached all purpose flour
2 T. warm water
1 1/2 t. dry yeast

Dough:
1/2 c. almond milk
3 T. evaporated cane juice
3/4 t. sea salt
1 T. flax meal mixed with 2 T. warm water
1 T. Earth Balance, melted
2 c. unbleached all-purpose flour

Topping:
2 T. cold, strong coffee
1 1/2 t. evaporated cane juice
Melted Earth Balance

Filling:
1 3/4 c. ground walnuts
1/4 c. almond milk
1/4 c. Earth Balance
1 T. flax meal mixed with 2 T. warm water
1/4 t. vanilla extract
1/2 c. sugar
1/4 t. unsweetened cocoa powder
1/4 t. cinnamon

Directions:
1. In a small bowl, combine all things needed to activate yeast and allow to stand for 5 minutes. 
2. To make the dough, start by heating the almond milk in a saucepan to just below boiling. You want to scald the milk. Allow to cool slightly. 
3. In a large bowl, combine milk with the evaporated cane juice and salt. 
4. Add the flax/water mixture (flax egg), yeast, Earth Balance, and flour. Mix well, then turn onto a floured surface to knead. Gradually add flour and knead until the dough is smooth and does not stick. 
5. Place dough in a lightly oiled bowl, cover with plastic wrap,  and allow to rise for an hour and a half in a warm place.
6. Meanwhile, make the filling. In a large bowl, mix walnuts, cane juice, cinnamon, and cocoa. 
7. Heat almond milk and Earth Balance in a saucepan. Bring to a boil. 
8. Pour mixture over the nut mix and stir well. Allow to sit at room temperature until ready to use. 
9. Once dough has risen, place dough on a large surface, sprinkled with flour. Roll with a rolling pin until 10-12 inches in diameter. Continue to roll and stretch dough until the dough is so thin, you can almost see through it. 
10. Spread filling over the entire sheet of dough. 


11. Roll dough like a jelly roll, then pick up and place into a greased loaf pan in a "U" shape, with ends meeting in the middle. Coil the dough around itself. Brush the top with the coffee mixture. Cover and allow to rest for 15 minutes.


12. Bake in a 350 degree F oven for 15 minutes, then reduce the heat to 300 degrees F and bake for another 45 minutes. Remove from over and brush with melted Earth Balance. Allow to cool for 20-30 minutes and then slice (turn loaf upside and cit with serrated knife).


Thanks for another great challenge, Daring Bakers!

What's the prettiest thing you've ever made?
Much love,

9.27.2011

Daring Bakers: Croissants Galore!

Welcome to another Daring Baker's Challenge! This month... CROISSANTS.

The Daring Bakers go retro this month! Thanks to one of our very talented non-blogging members, Sarah, the Daring Bakers were challenged to make Croissants using a recipe from the Queen of French Cooking, none other than Julia Child!

After reading the recipe, I was a little scared that these guys would take 12 hours to make. That's a LONG time, especially in a dorm room. But you know what? It's a challenge. So I'll take it on!

I made a few different types of croissants: original, bananas foster, and apple butter with almonds. 

No, I've decided I'm not going to post the recipe for this. It's long and complicated, and if you want to see how Julia Child does it, you can watch her video HERE. 


All I can say is: WOW. These were flakey, buttery, and delicious. Definitely could NOT tell that they were vegan, considering the only difference was using Earth Balance for butter and almond milk for regular milk!

I filled some with my bananas foster filling, using a mashed banana, cinnamon, and brown sugar. I sprinkled the tops with cinnamon sugar. This was my favorite flavor. Others I filled with apple butter and almonds and made them into little packets. I used apple butter mostly because it's fall and my desire for fall foods (pumpkin, apples, cinnamon, apple cider, pie, etc...) is kicking in. I love fall!


I highly recommend that you all take the time to try making this beautiful things. The layers in the dough that you can see after only folding it and letting it rise once (you do this like, 10 times!) is ridiculous. I love that you can pull apart the layers.

Food is beautiful. Thanks for the [successful] challenge, Daring Bakers!

Much love,