Showing posts with label cake. Show all posts

12.18.2013

WIAW #38 + DIY Mini Paper Flag Banner

Have you entered my Hail Merry giveaway yet?! If not, go enter NOW! :)

Welcome to another week and another WIAW! I'm really bad at remembering to take pictures of my food, but here are some things I ate this week....


{Soups} I ate a lot of veggie soups this week, like a broccoli puree soup and a sweet potato puree soup! Yum! {Desserts} I made cherry limeade snowball cookies (recipe coming soon) & owl cookies. I also had some cheesecake from the Cheesecake Factory, and some Dove dark chocolate that my secret santa gave me! {Appetizers} I had Tex Mex Eggrolls from the Cheesecake Factory (delish) and lots of hummus & crackers, among other things.

Also, I finished my Christmas playlist this week and thought I would share it with everyone! I'm not a fan of your typical, old fashioned Christmas songs. I like Christmas music if it's done by bands like The Civil Wars, Sufjan Stevens, etc... in other words, I like indie rock inspired Christmas music. 

And I figured there were others like me... so here you go!


To get the actual Spotify playlist, CLICK HERE.

Guess what else I did this week? Some prepping for the big, upcoming BIRTHDAY BASH! I have another DIY for you today...this one is brief, and the picture isn't the prettiest, but better pictures are coming on DECEMBER 26TH when this banner sits atop the Passing Daisies third birthday cake! YAY!


As you can see by the picture, today's DIY is for a mini paper flag banner. I am kinda obsessed with flag banners. I love them, especially when they are made of burlap! I made this banner to stick in our upcoming birthday cake - a key lime cranberry cake - and I think it's adorable! Here's how to make it. 

DIY Mini Paper Flag Banner

Supplies
Scrapbook paper
Thin Sharpie
Twine
Scissors
Skewers, chopsticks, or other small wooden sticks
Tacky glue

How To Make It
1. First, cut your scrapbook into small triangle shaped pieces of paper. You can do this a variety of ways, but I found it easiest to cut one triangle, and then use that as a template for the rest. Simply trace around the triangle and then cut the paper out.
2. Once all your triangles are cut out, write one letter on each triangle until you've spelled what you want.
3. Glue the triangles to a piece of twine until all letters are glued. The twine should be long enough to hold all your letters. In the picture above, I made two separate banners. 
4. Allow to dry. Once dry, glue each end of the twine to a skewer. You should need two skewers for each banner you make. 
5. Ta-da! You have banner! Stick it wherever you'd like! Easy peasy.

Like I said, better pictures will be revealed on December 26th along with the recipe for our key lime cranberry cake AND a birthday recipe link up with other bloggers! Be sure to check back because you don't wanna miss it!

Wanna join in the link up? Just EMAIL ME! Still looking for more to join the fun! <3

12.03.2013

WIAW #36 + Paleo Chocolate Chip Pancakes

Hey friends! I hope everyone had an EXCELLENT Thanksgiving! 

I'm going to apologize right off the bat - I forget to take pictures of my Thanksgiving meal for WIAW this week. So, instead, you can read what I ate on Thanksgiving below!

Gardein's Holiday Roast...and some real turkey as well :)
Green Bean Casserole - The Post Punk Kitchen
Pumpkin Tiramisu - Chloe Coscarelli
Mashed Cauliflower 

Here's a look at some other things I ate this week.....


{Left to right} Snickerdoodle Cookie Dough Cake (recipe coming soon...)
Paleo Chocolate Chip Pancakes (recipe below)
Lunch at the Cincinnatian Hotel (items in picture: chocolate mousse cake and moscato)
Chocolate covered bacon

So....these Paleo Chocolate Chip Pancakes.

The recipe is THIS ONE, slightly modified. The recipe is good on its own, but EVERYTHING is better with chocolate. 


Paleo Chocolate Chip Pancakes

{Ingredients}
1 banana
2 eggs
Chocolate chips
Strawberries + sugar {optional}

{Directions}
1. In a small food processor, blend banana and eggs. You can mash the banana if you want, but I think the food processor is WAY easier. 
2. Allow to rest for a couple minutes (this allows the batter to thicken slightly).
3. Heat a lightly greased skillet to medium-high heat. Place one ladle of batter into pan. Sprinkle a handful of chocolate chips on top.
4. Cook until you see bubbles forming on the surface, and the bottom is slightly brown. Flip to other side. 
5. Cook for about 30 seconds and then place on a plate.
6. {optional} Slice some strawberries and sprinkle with sugar. Allow to sit for a few minutes to create a sweet syrup. Spoon strawberries on top of pancakes. 
7. Enjoy!

Pretty straightforward.... right?!

Here are some things that will soon come to Passing Daisies! Get excited!

{Advent Calendar printable}
{More holiday gift guides}
{Snickerdoodle Cookie Dough Cake}
{Whirlybird Granola review/giveaway}
{PASSING DAISIES BIRTHDAY LINKUP}*
{NuNaturals Review/giveaway}

*I'm looking for bloggers to participate in a link up with me and create a fun birthday recipe! I've got the details. EMAIL ME to find out more <3

Have a lovely week and let me know what you ate for Thanksgiving!

2.05.2013

Love & Red Velvet Cake

I know it's a bit early for Valentine's Day, but bear with me.


Love is in the air!


Thinking about Valentine's Day makes you do one of two things: groan (if you're single) or have incredibly high expectations for your significant other (if you're in a relationship). I fall into the first category - that of being single. However, this year I'm not groaning.

Because this is the first Valentine's Day in a couple years that I'll be single, you'd think I'd be a little heartbroken and disappointed that I won't be receiving chocolates and roses. Yet I'm just the opposite. Why? Because the love of friendship is in the air!

It sounds cheesy, I know. But the 2012-13 school year, even with my massive breakup, has been one of the greatest years of my life because it has allowed me to develop close friendships with people that I didn't see often before. Especially within Navigators - the people I have become close to have inspired me to grow closer in my relationship with God and with other Navs members. I've been intellectually challenged by friends and, honestly, have probably learned more this year than ever before because of the people I hang out with. As I recently read in the book Imagine by Jonah Lehrer (I highly recommend it, by the way - go read it!), we intentionally place ourselves around smart people because we become smarter by hanging around them. And it's true - I've noticed myself doing that this year, and I'm incredibly excited about the level of my intellectual growth.  


So, that brings us to three types of love in the air - a love for friendship, a love for God, and a love for knowledge.

Who cares about being in a relationship, anyways? We should be satisfied with being on our own. Spending our time hunting for a boyfriend isn't how we should be living life. We should be engaging with others, developing friendships, seeing the world, learning, and having fun. God will bring us the right person when the time is right.


With that being said - be happy to single this Valentine's Day, and go bake yourself a cake! If you want to be specific, you can make the white chocolate cherry red velvet cake recipe below. It's delicious and it's pretty - what more could you ask for?


Red Velvet Cake with White Chocolate Cherry Frosting

Based on this recipe 

2 1/2 cups all purpose flour
2 cups sugar
1 Tablespoon cocoa
1 teaspoon salt
1 teaspoon baking soda
2 eggs
1 1/2 cups oil
1 cup skim milk
1 Tablespoon vinegar
1 teaspoon vanilla
2 oz. red food coloring

Directions
Preheat oven to 350 degrees.
Grease and flour two 8 inch cake pans.
Lightly stir eggs in a medium bowl with a wire whisk. Add remaining liquid ingredients and stir together with whisk until blended. Set aside.
Place all the dry ingredients in your mixing bowl and stir together really good with another wire whisk.
Add wet ingredients to the dry ingredients and mix on medium-high for about a minute or until completely combined.
Pour into cake pans and then drop the pans on the counter a few times to release any air bubbles.
Bake for about 30 minutes or until a toothpick inserted comes out clean.
After about ten minutes, remove from pans and cool completely on a wire rack. I also cover in plastic wrap while the cakes cool.
Then make the frosting.


White Chocolate Cherry Frosting
3 T. white chocolate chips
8 oz. cream cheese
1 stick butter
6 T. cherry preserves (or more to taste)
5 c. powdered sugar

Directions
In a microwavable bowl, melt chocolate chips. Allow to cool slightly. 
Beat together cream cheese and butter until combined. 
Add melted chocolate and cherry preserves and stir. 
Slowly add powdered sugar until incorporated. 
Frost cake and enjoy!

6.27.2012

Daring Bakers: Battenberg Cake

First, congrats to the winners of the last set of 21 Days of Giveaways winners! 


Mary B - Cookiehead brownies
Mkbell -Jillian Michael's DVD
Amy Lauren –Amy’s coupons
Laurel C – Perfect Fit Protein Powder
Positivelyhope – Trader Joe’s Gift Card
Janice - NuNaturals Liquid Stevia
Meredith M - NuNaturals Liquid Stevia
Jordan - NuNaturals Liquid Stevia
Rebecca  - NuNaturals Liquid Stevia


Congrats! Please email me your addresses so the goodies can be mailed to you! :)

This month for Daring Bakers, we made Battenberg Cake. Do you know those artsy little cakes that look like this?


Aren't they pretty? 

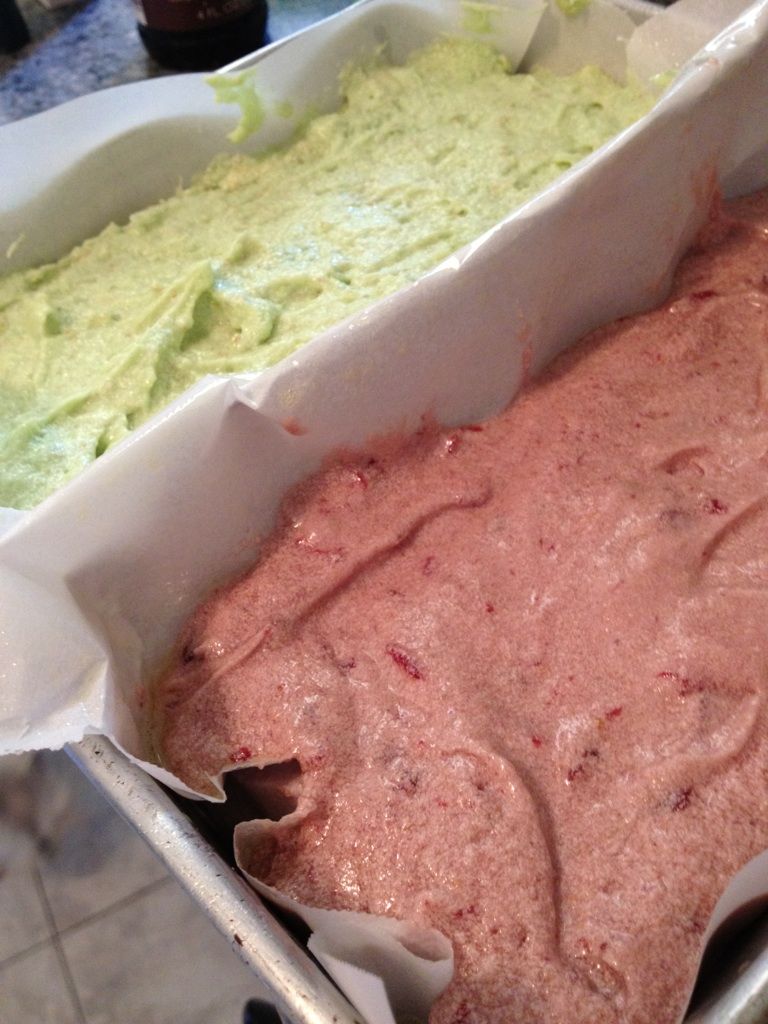
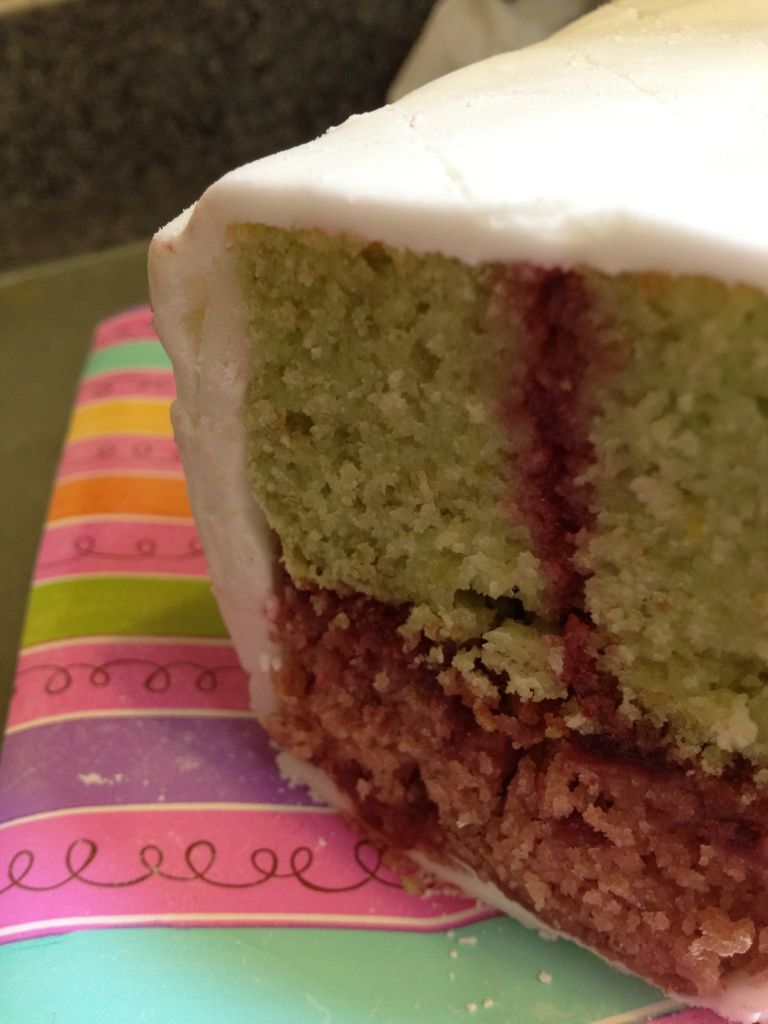
Well, mine didn't work out so much. I tried to make a cherry lime battenberg cake. 

Mandy of What The Fruitcake?! came to our rescue last minute to present us with the Battenberg Cake challenge! She highlighted Mary Berry’s techniques and recipes to allow us to create this unique little cake with ease.

Or at least, that's what we were told. This cake was definitely not easy for me. It should have been, but some of the flavoring tweaks I made to the cake recipe made for a very crumbly cake that didn't hold up. Not to mention that the cake colors looked awful. I was going for a beautiful pale pink and green, but instead....well, see for yourselves. 


It looked good going into the oven...


...And terrible coming out of the oven. The lime cake (green) held up pretty well, but the cherry cake (red) turned ugly and broke apart whenever it was touched. Needless to say, I will have to try making this cake again...but following the recipe this time! It's just too bad that I hate following recipes so much....

Hopefully it'll be better next time! Thanks Daring Bakers!

Much love, 

5.03.2011

Cake Bread!

Good morning everyone!!! I'd like to start off this post by sharing a conversation that happened around 3am last night.. so awesome.
Pat: Were those vegan? (talking about my cake pops)
Jake: Does that bother you a little bit?

Pat: yeah.
Jake: It bothers me a little too. 
Me: Why does it bother you that its vegan?
Pat: Because they're good!

Cake Bread!!

First of all, I would like to thank the few people who commented on deciding on a career path. Reading your comments were extremely helpful. I'm still having a hard time deciding, but at least I'm thinking about this now! I've also been told by multiple I should take some business classes in case I want to open a bakery in the future. Good idea? Should I stay the extra semester at Xavier and take some business classes? So many decisons!!!

ANYWHO. :) YAY FINALS. right? wrong. boring, but we have to do it, right? I am probably one of the best procrastinators I know, and I stayed up until 430am last night (note: my final was at 830am today) "studying" .... aka eating food and watching TV with my friends in their apartment. At least my final wasn't too ridiculously hard!!

Another way I procrastinated was by.. dun dun dun.. cooking! Of course! So, yesterday I had my friends Pat, Jake, and Anna over for dinner. I made spaghetti with marinara, gnocchi with wilted spinach and butter sauce, cake pops (my first attempt - recipe to be posted later) and....CAKE  BREAD!

Cake bread started out as cake, but I didn't want to use up all my Earth Balance, so I used oil instead. Honestly, I think it tasted like a sweet cornbread because of the pan it was cooked in.. I could it in a 9 x 11 pan, which made the cake really thin. A no no. Please use a smaller square pan if you want to make a nice fluffy cake :) (A similar thing happened to the cake I used for my cake pops). anywhooo... this was supposed to be a grapefruit cake and it ended up tasting like sweet cornbread.. you could eat it with icing or with a bowl of chili. very versatile. Try it out!

Cake Bread
1/2 c. canola oil
1/2 c. grapefruit juice
3/4 c. sugar
1 1/2 c. flour
3 Ener-g egg replacers (powder form)
1 1/2 t. baking powder
1/2 t. baking soda
1 c. milk substitute
1/4 t. salt

In a large bowl, combine oil, grapefruit juice, sugar, and milk substitute. Stir until well combined. Dump in all dry ingredients and mix until just combined. Spray a 9 x 11 baking pan with cooking spray and pour batter into pan. Bake in a 350 degree oven for 30 minutes, until the top is a dark golden brown. Enjoy!


Is it cake? Is it bread? That's for you to decide (I personally would classify it as a corn bread). Like I said, this was surprisingly good, so give it a try and let me know what you think!
Also, I've decided to post a question at the end of each post for you guys to comment on - I love hearing what you have to say! (Inspired by Chef Katelyn)

What is your favorite "kitchen mistake" - where you tried to make something, it didn't turn out, but it still tasted amazing?